vSphere 5.1 Auto Deploy on Cisco UCS C220 M3 Server
January 7, 2013 in Systems6 minutes
I set up Auto Deploy in my home lab using vSphere 5.1 on an existing server, in order to boot a Cisco UCS C220 M3 server whose local hard drives have not arrived yet.
I followed Duncan Epping’s walkthrough for Auto Deploy on vSphere 5.0, but this post is about what I had to do differently to get it working. Hopefully I save you some headaches. There might be some improvements to this process, but I was under a deadline and I know that it worked for me - please share any improvements in the comments.
I will first go through my installation of vSphere 5.1, as it was my first, (I know how late I am to that party) then I’ll pick up after that with my Auto Deploy configuration, which follow’s Duncan’s post for the most part.
vCenter Installation
First, download the latest version of vCenter. I used “VMware-VIMSetup-all-5.1.0-880471.iso”.
I had some issues setting up vCenter the first time, and for various reasons, I ended up deleting the VM and recreating it (Windows 2K8 R2) so I could try again, taking snapshots along the way so I could revert back easily.
On that first try, though, I had a ton of issues related to authentication (Single Sign On is new in 5.1), and even just connecting to vCenter, even for the local installation of Auto Deploy.
On the second try, I did a bunch of things differently, some of them might not be needed, but it ended up working anyways. First, SSO REALLY wants to have an AD domain to authenticate to, even though technically it could use local authentication. To avoid the headache, I just went ahead and set up an AD domain, (the DC would serve as a DHCP server later anyways) and after installing VMware tools on the DC and vCenter, as well as joining vCenter to the domain, I made sure I was logged in as a domain user (Administrator) to vCenter, not the local user or admin.
I also opted to install the components separately, rather than use the menu item labeled “Simple Install”. I had issues with this last time, and if you select this option, it will tell you that you can install the components separately for additional granularity, as long as you go in the order it shows below:
Be sure to pay attention when the vCenter installation asks who the vCenter Administrator is. You won’t be able to log in to the local machine account by default, meaning that AD authentication is mandatory, because of SSO. So….be sure to pick the right user, or if you desire, an AD group.
Once installed, I was not able to authenticate to vCenter, even if my life depended on it. I tried all forms of entry for the user I specified as the admin in the last step, such as just username, or domain\_username, or username@domain. None worked. When I installed the vSphere Client locally on the vCenter VM, and checked the box “Use Windows Session Credentials” (Remember, the vCenter VM is joined to the domain) it worked. Barring anything I did incorrectly, it seemed very much that vSphere would not let me log in unless I was doing so from a machine joined to the same domain. I understand the push to the web client and SSO, but if that’s the reason, that’s a bit much - just saying.
Also, until I figured this out, and successfully logged into vCenter at least once using the locally installed vSphere client, I was not able to install Auto Deploy - the installer would always tell me that my credentials it was using to connect to vCenter were incorrect. I logged in once, then tried again, and it worked. Could be a coincidence, but I didn’t really do much else.
Auto Deploy Configuration
I followed the article at the top of this post for the most part, but had a few key differences, due to either differences with 5.1, or the fact I was booting a Cisco UCS C220 M3.
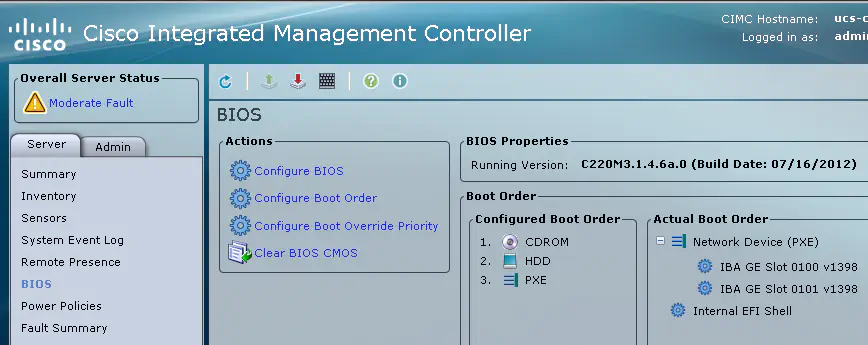
First, I wanted to make sure that the server was configured to boot from the network - I set up this order in the CIMC:
You can use Solarwinds TFTP if you want, but you’d be better off getting introduced to tftp32 (or tftp64) - it’s IPv6 capable (always a must with me) and it’s just so very lightweight - something that is NEVER heard in the same sentence as Solarwinds.
I chose to simply set up DHCP on the Windows domain controller I had set up for ease of use - adding DHCP options in Windows DHCP is very straightforward. All I had to do was add these two options - change the server IP address to match your Auto Deploy server and ensure that the string for option 67 matches the string found in the Auto Deploy plugin in the vSphere Client.
The rest is PowerCLI magic, so ensure you have that installed for the rest of the steps.
Where it says to add a software depot, he uses some ZIP file he had at c:tmpVMware-ESXi-5.0.0-469512-depot.zip. I did not know what he was talking about - after looking several times, the only ZIP file I see mentioned are the small files in the TFTP root to be used for PXE boot, no software depot. Instead, I used the main software depot from VMware’s site:
Add-EsxSoftwareDepot https://hostupdate.vmware.com/software/VUM/PRODUCTION/main/vmw-depot-index.xml
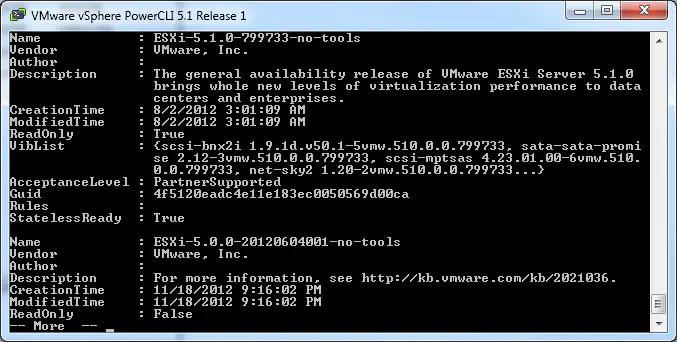
Since I wasn’t using his software depot, I needed to find the available ESXi image profiles from the online depot. If you run “Get-EsxImageProfile” like he says at this point, you’ll get everything in the online software depot, which will scroll by way to fast to find. Run with the “more” piped command:
Get-EsxImageProfile | more
and you’ll notice that there’s an ESXi image called “ESXi-5.1.0-799733-no-tools” that I wanted to use for this.
Next, you need to create a deploy rule that basically dictates the type of machine that’s able to boot this image:
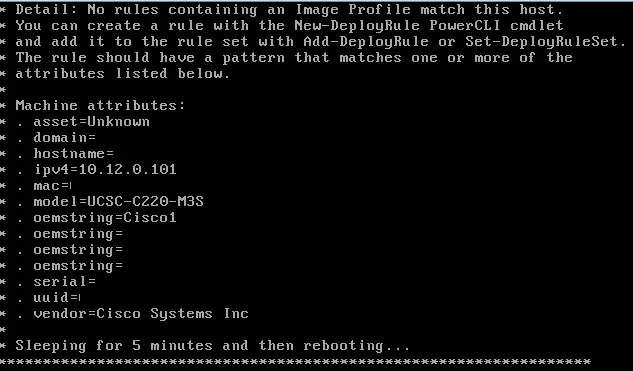
Be careful not to just copy what either Duncan or I have written for the “Pattern” attribute - this is specific for your server. I made this mistake for the first go-around, but fortunately, Auto Deploy should display some kind of message showing you what you need to do.
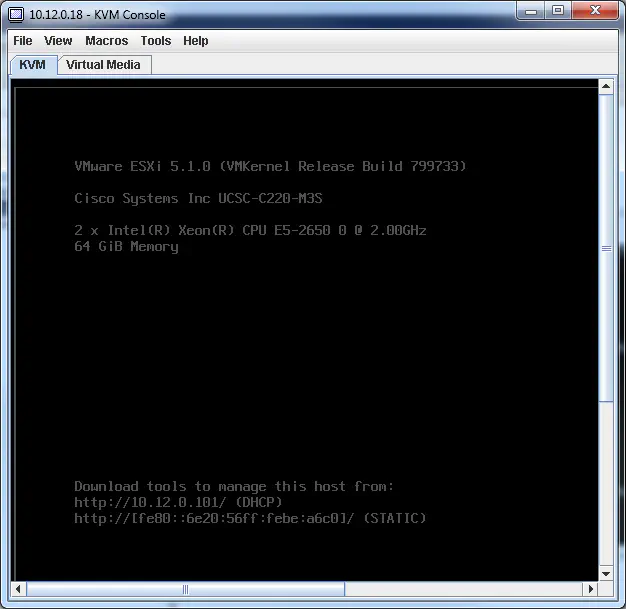
I matched the string as shown in the example above, and everything worked out great! I was greeted upon reboot of the UCS server with the ESXi DCUI:
(By the way, IPv6 is enabled by default, and can be administered via the link local address shown above. I will be testing ESXi’s ability to use IPv6 autoconfiguration sometime later today. Cool!)
I stopped here - my goal with Auto Deploy was simply to get the hosts online without hard drives, so the additional work to get them statelessly configured wasn’t necessary. However, it looks like the rest of the process is very similar to traditional Auto Deploy, for those that have created relevant answer files before.
Hope I helped provide a little more insight into this process.


