Title here
Summary here
January 7, 2014 in Systems7 minutes
I’ve been hearing a lot about libvirt, so I figured I’d check it out, and see if I could play around with it in my own home lab.
According to the wiki, libvirt is a “collection of software that provides a convenient way to manage virtual machines and other virtualization functionality, such as storage and network interface management.” Okay that’s pretty cool - basically if I have a multi-hypervisor environment, I can build my operational policies around libvirt, so that no matter what hypervisor a workload is being instantiated on, the process is the same.
The thing I’ve been wondering is the role of libvirt in software like OpenStack - I’ve heard from some that it’s heavily used, and then I hear that OpenStack can/does interact directly with the hypervisor. Unfortunately I haven’t had a chance to dig into the code to figure that out for myself, but after this experience, I will soon. In the meantime, this OpenStack wiki article shines a little light on the subject:
One thing to note is that although libvirt supports the above ‘drivers’, using native APIs (such as the Xen XML-RPC API) is almost always going to provide more functionality vs. libvirt. This is why we have the XenAPI (nova/virt/xenapi/*) implementation as well as the libvirt implementation.
So it looks like there’s a little bit of both. Perhaps libvirt is used when a multi-hypervisor environment is present (which is pretty much what it’s designed to do from what I can tell) but since there’s no way libvirt can address every single feature in every single hypervisor, OpenStack allows for “direct-connect” capabilities if you’re only running one type.
There are also a few terms I’d like to define:
virt-manager - a GUI tool for managing either a local or remote hypervisor. I used this pretty much for the sole purpose of having a graphical console that lets me install the guest OS.
virsh - a CLI tool that is pretty much your one-stop-shop for managing libvirt. Think of this as the CLI version of virt-manager, but with even more functionality.
instance/domain - these are all terms to describe what I’ve come to know as a virtual machine. Libvirt does tend to refer to these more as “domains”, and the “instance” terminology comes from more of an OpenStack background. However, these all mean the same thing.
Despite the multi-hypervisor intent of libvirt, I’ll merely be using it as an interface through which to manage KVM - or more accurately, qemux86_64. Let’s get into it, shall we?
If you have the repos to support it, you can install from apt-get (I’m running ubuntu server 13.10 and the repositories contain OVS 1.10.2 at the time of this writing). Of course, build from source is also an option.
root@swarmhost:~#apt-get install openvswitch-datapath-source bridge-utils
root@swarmhost:~#module-assistant auto-install openvswitch-datapath
root@swarmhost:~#apt-get install  openvswitch-switch openvswitch-common openvswitch-controller
A quick configuration so that our host uses the virtual bridge interface, rather than the physical interface, for management (obviously this could break your connection to it).
root@swarmhost:~# ifconfig p2p1 0.0.0.0
root@swarmhost:~# ovsvsctl add-br br0
root@swarmhost:~# ovsvsctl add-port br0 p2p1
root@swarmhost:~# ifconfig br0 10.12.0.10 netmask 255.255.255.0 up
root@swarmhost:~# ovsvsctl add-br br0
Be sure to modify /etc/network/interfaces to reflect this configuration (i.e. apply static IP address to the bridge interface on boot rather than the physical interface)
We’ll come back to Open vSwitch after we have a running virtual machine.
Libvirt needs to be aware of the storage you intend to make available to the underlying hypervisor. I had two directories I wanted to make available: one for ISOs, and the other for the instance images themselves. Defining the XML for this was a simple matter:
mierdin@swarmhost:~/virshdefs$ cat isos.xml
<pool type="netfs">
  <name>isos</name>
  <source>
    <host name="10.12.0.4"/>
    <dir path="/NFS/KVMShare/ISOs"/>
    <format type='nfs'/>
  </source>
  <target>
    <path>/mnt/isos</path>
  </target>
</pool>
mierdin@swarmhost:~/virshdefs$ cat instances.xml
<pool type="netfs">
  <name>instances</name>
  <source>
    <host name="10.12.0.4"/>
    <dir path="/NFS/KVMShare"/>
    <format type='nfs'/>
  </source>
  <target>
    <path>/mnt/instances</path>
  </target>
</pool>
Then just import these XML files:
mierdin@swarmhost:~$ virsh pool-create virshdefs/isos.xml
mierdin@swarmhost:~$ virsh pool-create virshdefs/instances.xml
mierdin@swarmhost:~$ virsh pool-list
Name                 State      Autostart
-----------------------------------------
default              active     yes
instances            active     no
isos                 active     no
If you use virt-manager to connect to this host, you can see these storage pools show up in the GUI and we could continue there to install our virtual machine.
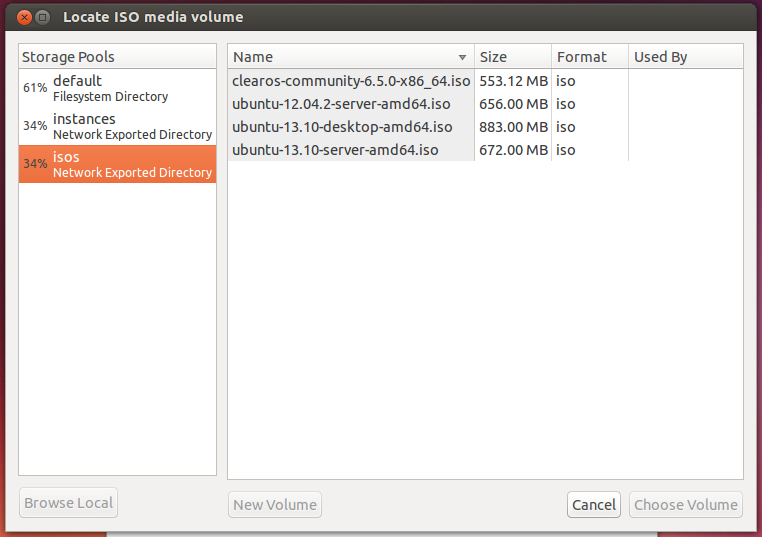
But who wants to do that? Back to the terminal!!
We first need to prepare a .img file for use with this instance. Simple one-liner:
mierdin@swarmhost:/mnt/instances$ sudo qemu-img create -f qcow2 -o preallocation=metadata stukov.img 30G
Formatting 'stukov.img', fmt=qcow2 size=107374182400 encryption=off cluster_size=65536 lazy_refcounts=off
We could simply run a command to install the OS direction with KVM now if we wanted, but I wanted to use libvirt, plus I didn’t have a graphical console installed on the host, so I kind of needed to use libvirt in the first place. So, we now have to define the instance, with all it’s properties, and mount the right ISO in the process.
The below command is also useful for creating virtual machines on a server with no console. The “–graphics” arguments allow VNC connections to come in from any network interface and libvirt will not try to launch a console automatically because of the “–noconsole” argument. Run:
virsh vncdisplay
to figure out the way to connect via VNC to this domain.
mierdin@swarmhost:~$ virt-install
              --connect qemu:///system
              --virt-type kvm
              --name stukov
              --vcpus=1
              --ram 1024
              --disk path=/mnt/instances/stukov.img,size=30
              --graphics vnc,listen=0.0.0.0 --noautoconsole
              --cdrom /mnt/isos/ubuntu-12.04.2-server-amd64.iso
              --network network=default,mac=00:00:34:fc:54:2b
              --os-variant ubuntuprecise

Starting install...
Allocating 'stukov.img'                                                                                                                                   |  30 GB     00:00
Creating domain...                                                                                                                                        |    0 B     00:00
Domain installation still in progress. You can reconnect to
the console to complete the installation process.

mierdin@swarmhost:~$ virsh list
 Id    Name                           State
----------------------------------------------------
 6     stukov                         running
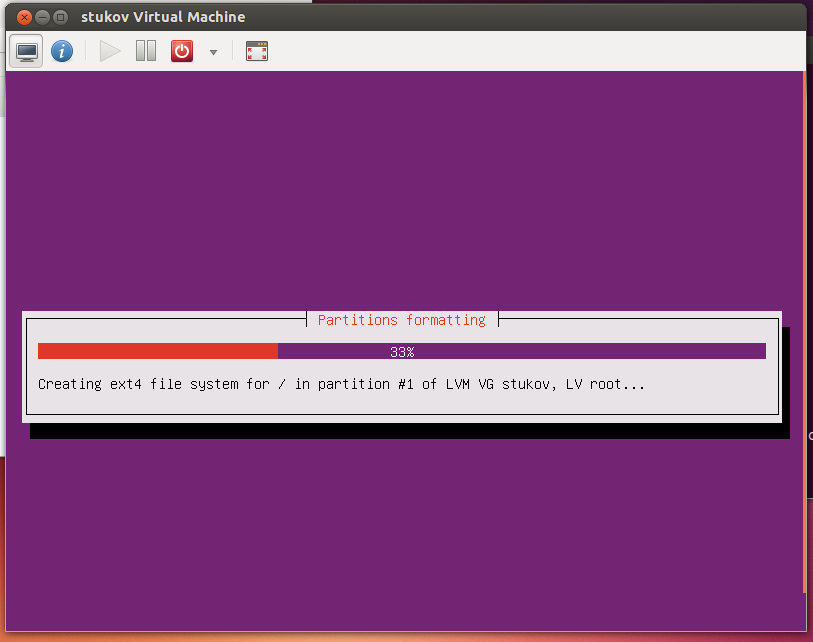
As you can see, my server is barking at me because it’s a server distro (no GUI) - so I loaded up an ubuntu desktop virtual machine within VMware workstation and just used virt-manager to finish the job:
If you wish to use remote VNC to access this console, you must first enable listening on a non-loopback address as shown in the answer here.
So after booting my virtual machine, I noticed that with the configuration I gave, it pulls a random address from the 192.168.122.0/24 subnet:
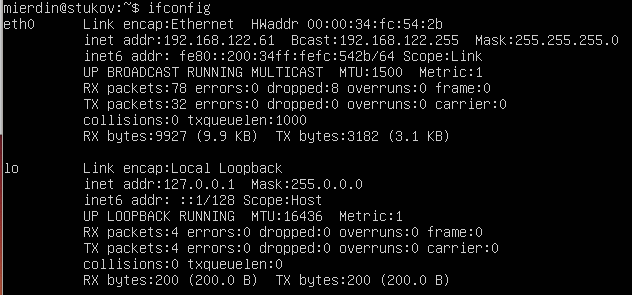
Since this isn’t a subnet in use on my network, I assumed libvirt is using some kind of NAT configuration by default (it is). That’s not quite what I want, so I need to get this virtual machine integrated with Open vSwitch.
Surprisingly, I stuck with the wiki and docs for libvirt without googling - which is SO unlike me - and got a lot figured out before I finally stumbled upon Scott Lowe’s awesome walkthrough that tells you everything you need to know.
Libvirt just needs to have some networks defined ahead of time that point to OVS:
mierdin@swarmhost:~$ cat virshdefs/prodnet.xml
<network>
  <name>prod-ovs</name>
  <forward mode='bridge'/>
  <bridge name='br0'/>
  <virtualport type='openvswitch'/>
  <portgroup name='vlan-10' default='yes'>
  </portgroup>
</network>

mierdin@swarmhost:~$ virsh net-define virshdefs/prodnet.xml
Network prod-ovs defined from virshdefs/prodnet.xml

mierdin@swarmhost:~$ virsh net-start prod-ovs
Network prod-ovs started

mierdin@swarmhost:~$ virsh net-list
 Name                 State      Autostart     Persistent
----------------------------------------------------------
 default              active     yes           yes
 prod-ovs             active     no            yes
We verified the presence of the new network with virsh, so now lets edit our domain to use the new network. We’ll have to restart the domain to make the changes take effect.
mierdin@swarmhost:~$ virsh edit stukov

(irrelevant output omitted)
    <interface type='network'>
      <mac address='00:00:34:fc:54:2b'/>
      <source network='prod-ovs' portgroup='vlan-10' />
      <model type='virtio'/>
      <address type='pci' domain='0x0000' bus='0x00' slot='0x03' function='0x0'/>
    </interface>

mierdin@swarmhost:~$ virsh reset stukov
Domain stukov was reset
If you take a look at OVS now, you’ll see that libvirt took care of spinning up a virtual interface for us (vnet0):
mierdin@swarmhost:~$ sudo ovs-vsctl show
0095d1aa-22b9-4844-9b2c-3494bddcd6db
    Bridge "br0"
        Port "vnet0"
            Interface "vnet0"
        Port "br0"
            Interface "br0"
                type: internal
        Port "p2p1"
            Interface "p2p1"
    ovs_version: "1.10.2"
And that’s it! The OS should now be reachable over the network, provided it’s addressed properly.
This is more or less a simple walkthrough - there are a lot of folks out there that have already made the leap to libvirt and I’m jealous - it’s clear that these are powerful tools. This post is a result of me making these configurations happen on my “production” network at home, and that’s all because it’s the best way for me to learn (see also: IPv6). Stay tuned for more posts surrounding this new lab of mine - this was a fun one to write and I know I’m not done yet.