Title here
Summary here
March 28, 2014 in Systems8 minutes
One of my least favorite things to do in my day job is create or maintain a zoning configuration on a fibre channel switch, such as a Cisco Nexus or MDS. It’s tedious, very error prone, and annoying when changes need to be made. I wrote earlier in the week on the value of using a templating language like Jinja to define the structure of a switch configuration, but dynamic enough to accept all kinds of input from some higher-level intelligence elsewhere. In this post, I’m going to use this, and other tools in our “automation toolchest” to get fibre channel zoning configuration down to a science.
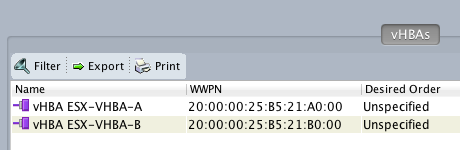
Each WWPN belongs to a single HBA and is considered to be unique (hopefully) on the SAN. I’m using Cisco UCS, so I’ve derived each vHBA’s WWPN from a pool, and it’s guaranteed to be unique. I like to name my FC zones by using some kind of combination of the service profile name and the vHBA name on that service profile.
In order to maintain the relationship between a Fibre Channel HBA and it’s World Wide Port Name (WWPN), we will be providing Python dictionaries as the preferred form of input to the Jinja template.
First, though, we need a good template. We’re going to address two major portions of a SAN configuration. The first part allows us to define aliases for our WWPNs, (typically towards the top), then near the bottom, the zoning configuration. We’ll leave the rest of the configuration out of this example template, but know that it is written for a Cisco Nexus 5K, so it’s by no means an exhaustive switch configuration - only relevant to the SAN functionality.
First, the alias database - the SAN admin’s way of “putting the name to the face”:
{% raw >}} device-alias database {% for wwpn, name in initDict|dictsort >}} device-alias name {{ name }} pwwn {{ wwpn }} {% endfor >}} {% for wwpn, name in targetDict|dictsort >}} device-alias name {{ name }} pwwn {{ wwpn }} {% endfor >}} device-alias commit {% endraw >}}
Much of this syntax should look familar if you read my first post on Jinja - all we’re doing here is defining the block of text that will form our alias database, but using looping techniques to iterate through a dictionary and output it’s content. The script we’ll write later will provide this dictionary, but in this template, we will take a key/value pair (wwpn being our key, and the name of the HBA being our “value”) and insert into the text. This line will be repeated for as many HBAs as are placed into the dictionary.
Also note that this process is repeated for another dictionary - “targetDict”, which will be pretty much the same thing, except it will be for the two WWPNs that are on our storage array. I built it this way because I’m pulling the WWPNs for these dictionaries using different means (more on this when we get to the Python).
The section for the zoning configuration is actually very simple. Because we’re already being provided two dictionaries - one for all initiators, and one for all targets - we can re-use these as many times as we want in the template.
{% raw >}} {% for wwpn, name in initDict|dictsort >}} zone name {{ name }}_TO_NETAPP vsan 321 member pwwn {{ wwpn }} {% for wwpn, name in targetDict|dictsort ->}} member pwwn {{ wwpn }} {% endfor >}} {% endfor >}} {% endraw >}}
The "
|dictsort" notation just forces the loop to use a sorted version of our dictionary so that our zones are in a nice order.
We’re doing much the same thing as with the alias database, with a few exceptions. First, you’ll notice that one of the FOR loops is nested inside the other. This is because I want one zone to be created for every initiator, and inside each zone, I want all targets to be listed. All text inside the outer FOR loop will run once for every entry in the “initDict” dictionary; this includes the inner FOR loop, which will output all targets contained within the “targetDict” dictionary.
Similar notation is used to create the zoneset for which all these zones should be a member (referring only to the name, since the WWPN is not needed) and I’m just statically activating the zoneset in the configuration.
{% raw >}}
zoneset name ZONESET_VSAN_321 vsan 321
{%- for wwpn, name in initDict|dictsort >}}
member {{ name }}
{%- endfor >}}
zoneset activate name ZONESET_VSAN_321 vsan 321
{% endraw >}}
That’s it for the template work, now lets get into the real meat of this effort.
Now that we’re moving into the pure-Python portion of this excercise, lets kick things up a notch and pull data for our initiators from a live system. The kind folks at Cisco have provided a nice SDK for interacting with Cisco UCS in Python, so we’ll be using this to generate our initiator dictionary in real-time, rather than relying on static data from a spreadsheet. This also allows us to do cool stuff like pull an existing SAN configuration, and do a differential configuration if any zones are missing (say if you decided to install more servers). More on this in a future post.
I take this approach whenever possible mainly because it helps to completely eliminate the possibility for human error in the process. There is no human middle-man sitting between a live compute system like Cisco UCS and a zoning configuration on the SAN switch itself when using this approach.
First lets get the housekeeping done. We need to connect to the UCS system and create the dictionary that we’ll populate with the data we retrieve:
    from UcsSdk import *

    handle = UcsHandle()
    handle.Login('10.12.0.136', username="config", password="config")

    vHBADict = {}
The Python SDK for UCS works by directly accessing the Managed Object tree….much more granular control than what folks are used to with the PowerShell alternative, but obviously far less intuitive. Fortunately, after some research, I was able to write a snippet that creates an array of virtual HBA “objects”:
    #Here I'm telling the SDK to look for vHBAs within the sub-organization "ORG_TEST"
    obj = handle.GetManagedObject(None, None, {"Dn":"org-root/org-ORG_TEST/"})
    moArr = handle.GetManagedObject(obj, "vnicFc")
Using a for loop to iterate through these objects and access the properties we want (specifically the “name” of the vHBA and it’s WWPN) is a breeze. I’ve placed comments inline to help clarify what I’m doing:
    for mo in moArr:
    	#Pull only actual vHBAs (not templates) and on the desired fabric (A/B)
    	if str(mo.Addr) != 'derived' and mo.SwitchId == 'A':

    		#We're retrieving Dn here so we can include the service profile in the name
    		origDn = str(mo.Dn)

    		#Need to do a little string surgery to transform the Dn of the vHBA into a proper zone name.
    		origDn = origDn.replace('org-root/org-ORG_TEST/','')
    		origDn = origDn.replace('/','_')
    		origDn = origDn.replace('ls-','')
    		origDn = origDn.replace('fc-','')

    		#using the WWPN address as key since more likely to be unique
    		vHBADict[mo.Addr] = origDn
Finally, we render our template, providing the dictionaries as arguments.
Note that I’m providing python methods as arguments here - I defined all the aforementioned code in a separate method for modularity, but you could easily provide our vHBADict object just as well.
    env = Environment(loader=FileSystemLoader('./Templates/n5k/'))
    template = env.get_template('nexus5548UP')

    print template.render(initDict=getUcsWWPNs(),targetDict=getTargets())
This provides me with the following output:
device-alias database
device-alias name ESXi-1_ESX-VHBA-A pwwn 20:00:00:25:B5:21:A0:00
device-alias name ESXi-2_ESX-VHBA-A pwwn 20:00:00:25:B5:21:A0:01
device-alias name ESXi-3_ESX-VHBA-A pwwn 20:00:00:25:B5:21:A0:02
device-alias name ESXi-4_ESX-VHBA-A pwwn 20:00:00:25:B5:21:A0:03
device-alias name ESXi-5_ESX-VHBA-A pwwn 20:00:00:25:B5:21:A0:04
device-alias name Netapp-01-0a pwwn 50:00:00:00:00:11:a0:01
device-alias name Netapp-01-0b pwwn 50:00:00:00:00:11:a0:02
device-alias commit

zone name ESXi-1_ESX-VHBA-A_TO_NETAPP vsan 321
  member pwwn 20:00:00:25:B5:21:A0:00
  member pwwn 50:00:00:00:00:11:a0:01
  member pwwn 50:00:00:00:00:11:a0:02

zone name ESXi-2_ESX-VHBA-A_TO_NETAPP vsan 321
  member pwwn 20:00:00:25:B5:21:A0:01
  member pwwn 50:00:00:00:00:11:a0:01
  member pwwn 50:00:00:00:00:11:a0:02

zone name ESXi-3_ESX-VHBA-A_TO_NETAPP vsan 321
  member pwwn 20:00:00:25:B5:21:A0:02
  member pwwn 50:00:00:00:00:11:a0:01
  member pwwn 50:00:00:00:00:11:a0:02

zone name ESXi-4_ESX-VHBA-A_TO_NETAPP vsan 321
  member pwwn 20:00:00:25:B5:21:A0:03
  member pwwn 50:00:00:00:00:11:a0:01
  member pwwn 50:00:00:00:00:11:a0:02

zone name ESXi-5_ESX-VHBA-A_TO_NETAPP vsan 321
  member pwwn 20:00:00:25:B5:21:A0:04
  member pwwn 50:00:00:00:00:11:a0:01
  member pwwn 50:00:00:00:00:11:a0:02

zoneset name ZONESET_VSAN_321 vsan 321
  member ESXi-1_ESX-VHBA-A
  member ESXi-2_ESX-VHBA-A
  member ESXi-3_ESX-VHBA-A
  member ESXi-4_ESX-VHBA-A
  member ESXi-5_ESX-VHBA-A

zoneset activate name ZONESET_VSAN_321 vsan 321
Looks good to me! :) This can then be pasted into an SSH or console session. It also wouldn’t be that much more effort to write a quick function using paramiko or similar to push this config over SSH within the same script.
The result of this are very beneficial for greenfield installs of an FC switch, since it takes care of the most tedious portions of a SAN configuration, but unfortunately it doesn’t do much for existing installations. If you wanted to delete or add a zone, you’d have to essentially play “config” surgery, even if the new zone is generated through this template. In Part 2, we’ll discuss some cool alternatives to this that enable existing installations to take full advantage of the functionality we created here.