Title here
Summary here
October 29, 2015 in Programming14 minutes
I’ve had a number of folks approach me about the topic of development environments, so I figured it was worth a blog post.
Maybe you’re curious what a development environment is, or perhaps you’re working through the challenge of developing code on one platform, and deploying on another. Maybe you already have a development environment - like a virtual machine - but you aren’t happy with your workflow, and feel it could use some upgrades.
If any of the above apply to you, this post should be useful to you.
Imagine yourself as a member of a software development team. You’re all working on the MegaAwesome project, which aims to solve global warming, world hunger, and basically anything wrong on this earth. With such high aspirations, it is important to put a process in place that ensures maximum developer efficiency, while maintaining an uncompromisingly high level of quality.
Any mature software development team will leverage version control like Git to ensure changes to the codebase are properly tracked and managed. They will also likely leverage some kind of continuous integration, or build server like Jenkins to run automated static code analysis (i.e. PEP8) or unit and integration tests on the codebase. These are all super important tasks for ensuring proper software quality, that many that are new to development may not know about.
The purpose of a build server is not only to ensure proper code style, or to make sure the application compiles. These are all important functions of the continous integration pipeline, but the greater purpose here is to emulate the production environment as closely as possible. This way, problems are caught here - before production - while still deploying as quickly yet safely as possible to production.
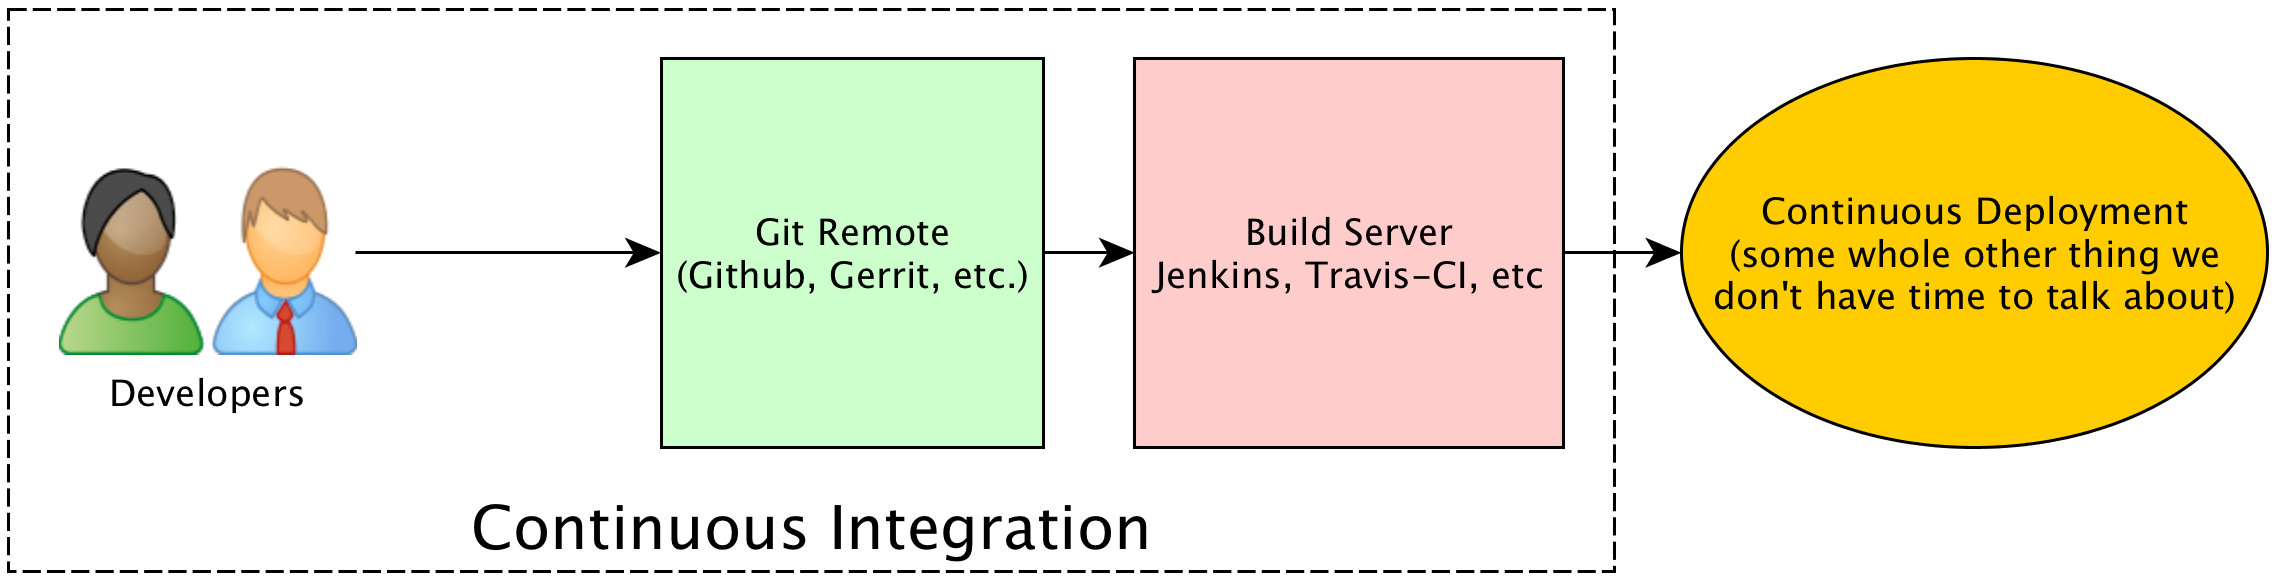
As mentioned in the diagram, the actual push to production, or “continuous deployment” is a totally separate topic that has it’s own challenges. For this post, we’re concerned with the initial push of developer code into an integration pipeline.
It’s very common to do development work directly on a laptop operating system, to preserve a seamless and responsive experiene. However, it’s highly unlikely that MegaAwesome will be deployed on a bunch of Macbook Pros running OSX. It is more likely that it will be running on RHEL, or a Debian-based distribution like Ubuntu. For that reason, the build server (i.e. Jenkins) will very likely run on the exact same platform as production. Let’s say that your production application servers run Ubuntu 14.04 - Jenkins will likely run this as well, either natively, or within a VM or as a container base image (depends on your setup).
The problem that emerges is that production and the build server are running one thing, and the developer laptops are running something totally different. Not only is the operating system likely totally different, but each laptop is likely configured with totally different software dependencies, since each developer likes to stick with the workflow that suits them best. It’s easy enough to set up a build server to mimic production, but now you’re talking about laptops with a different OS and no guarantee that the laptops are configured in any way similar to production.
So, you end up with a conundrum. Being able to write code directly on your laptop is very convenient, but it can create compatibility issues when it comes time to push your code into production. In contrast, setting up a virtual machine to write and run your code on helps to address compatibility issues, but it’s not always easy to come up with a convenient workflow in this model.
And we haven’t even mentioned the problems that arise when working on several software projects at once, all with different dependencies and versions of those dependencies. The native laptop experience can really break down when you scale up your output if you’re not careful.
So, we want to have a production-compatible development environment that’s as easy as writing code natively on your laptop OS.
There are many language-specific tools that help us solve this problem. Python’s virtualenv is one such example. However, my goal in this post is to help illustrate a language-independent solution. This solution is useful for a variety of platforms, lanauges, and workflows….and best of all, it’s fully automated! None of this will last unless it is stupid easy to set up.
The benefit at the end of the day is a consistent workflow that is easy to keep up to date as your application needs change (adding or updating dependencies, etc.) In addition, this same development environment is highly portable, in that it only takes a few text files for another developer to quickly produce a near-identical development environment, rather than passing around virtual machine images.
I will provide examples that are aimed at allowing you to have a development environment that conforms to production, but allows you to write code in your favorite editor natively on your laptop.
If you’ve not explored a terminal editor like Vim or Emacs, you really should. Though these examples will allow you to leverage a GUI-based text editor, there are some times when that is simply not possible. It’s a good idea to at least learn the basics of these editors, for those times when it’s all you have.
It’s important to remember that our development environment isn’t just about setting up a virtual machine. Our applications also have dependencies. Some of these dependencies are available via standard package managers like Yum or APT, and others are language specific, and have to be cloned from Github, or downloaded through Pip, etc. There are a myriad of things that need done before an environment is ready to run YOUR application, and if any of these things are done manually, that’s time not spent writing code.
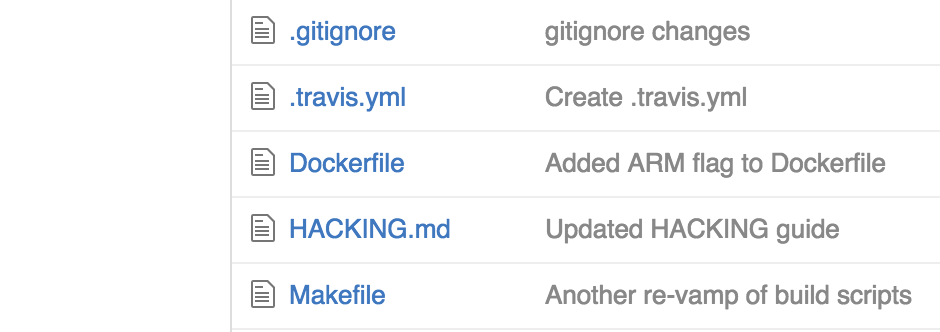
Another important concept to note is that our environment MUST be light. No one wants to pass around virtual machine images to each other - modern development environments are described in simple text files, from the VM itself, to provisioning all of the dependencies on top. Most modern build and deploy workflow function on text file that you can and should place directly in the source code repository. Example include Dockerfiles, Vagrantfiles, Makefiles, Travis CI YAML files, and on and on.
The benefit of putting all this in the repository is so that all of the build configuration is passed around with the code, and not kept within some server configuration. Rather than building excessively complex build steps in Jenkins, just write a script to do it all, and have Jenkins call that script. Developers no longer have to guess how Jenkins will build or test their software, because all of the configuration artifacts that Jenkins would use to do this are already in the repository, and the developer can run these tests in the exact same way.
This also makes it much easier for newbies to get started with a project. With all of these tools already in the repository, the number of commands a new developer needs to run or remember is drastically lower than it would have been before. No more “Oh, well you need to install the ‘python-dev’ package, duh!” - it’s all in the repo. Just “vagrant up”.
Now that we have the concepts down, we’re going to leverage a few tools to accomplish our goals:
This post assumes you have all these tools installed and ready to go on your laptop or PC. See the end of this post for the versions I am running.
Though Otto has been formally announced as a successor to Vagrant, Vagrant will be around for quite a while Otto gains maturity. For now, focus on the concepts, and decide for yourself what tool is right for you.
First, we need to clone the MegaAwesome project. The project is hosted on Github so we can clone it locally from there:
git clone [email protected]:Mierdin/MegaAwesome.git
cd MegaAwesome
Once in the MegaAwesome directory, we can spin up a virtual machine very easily using Vagrant.

Vagrant will take care of spinning up our virtual machine, as well as integrating with Ansible to install all of the necessary software dependencies described in our Ansible playbook.
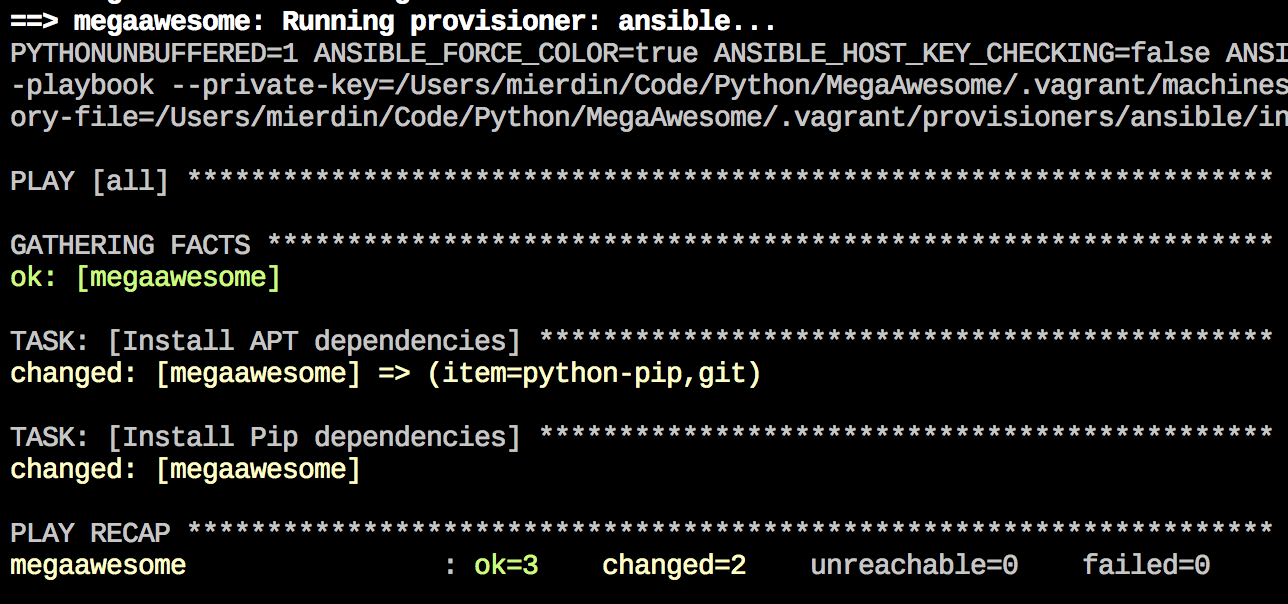
Note that this playbook is distributed alongside the Vagrantfile, all within the repository itself. There’s no more need to email around a list of APT packages to install - everything is contained within requirements.txt (which is a method of specifying Python/Pip software dependencies) as well as the Ansible playbook. Yes, I know I’m harping on this point. It’s that important.
Change your workflow? Add dependencies that you forgot the first time, or maybe didn’t know you needed? Modify the Ansible playbook, and run “vagrant provision”! Don’t forget to commit your changes to the Ansible playbook and push them back so the other team members can use them!
This is a VERY simple example of Ansible integration. Full Ansible capabilities are possible here, including roles and dynamic inventory - I’m just keeping it simple for this example. Take this and run with it!
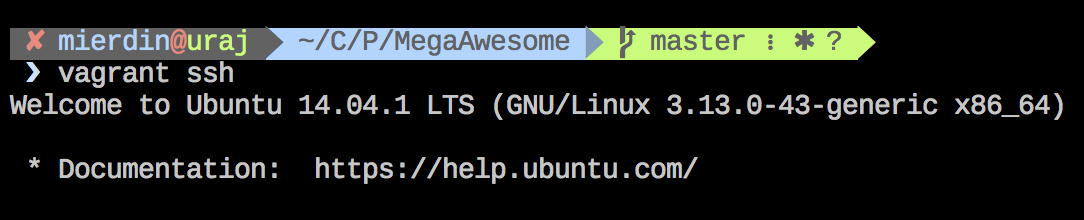
We can SSH very easily into the virtual machine thanks to Vagrant.
Once inside, it’s time to create a directory that contains our source code. I tend to use a someone lengthy one-liner for this:
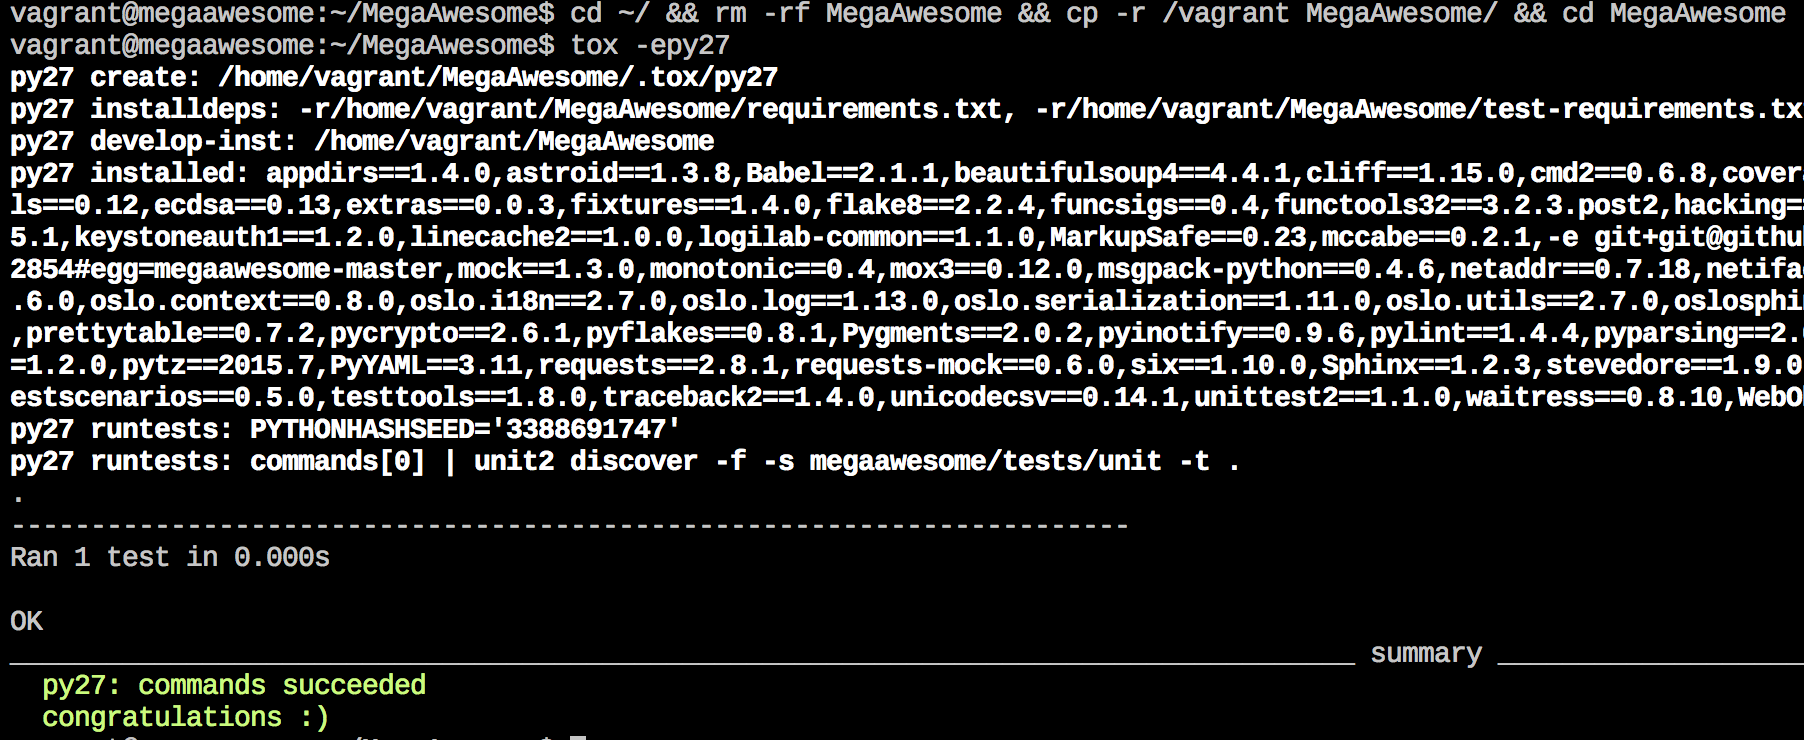
cd ~/ && rm -rf MegaAwesome && cp -r /vagrant MegaAwesome/ && cd MegaAwesome
I want to note this isn’t the only way to do this, and you can certainly run everything straight out of the shared directory. However, build tools like Tox are fairly I/O heavy, and I’ve found that this method of copying the directory fully into the VM first and building there to be much faster.
The above command does the following:
In plain english, the above command is a way of telling your environment “Okay, I’ve made some changes to my code. I’d like to test them now”. In this way, we have a single line that allows us to “push” our changes into our VM.
This is important - this means that we can edit our code using any method we see fit on our local laptop or PC, and still VERY EASILY get our code changes into the virtual machine that much more closely mimics a production deployment. File this under “best of both worlds”.
By the way, this “copy and run” approach is extremely similar to how things are done when building Docker images, at least within a Python context.
There are a myriad of “build” tasks that take place throughout a developer workflow. These include things like static code analysis, where the source code is checked for style errors per the standards for that language, to unit or integration tests, where source code test files are run to check the validity of existing functions and services in the codebase.
These are just a few examples - and each project may have specific tasks that are relevant only to that project. In order to provide these features, we need a tool that allows us to flexibly describe these steps. Since MegaAwesome is written in Python, we’ll use Tox, which is a popular choice. It’s also heavily used in the OpenStack community.
You may have guessed - there is a text file (tox.ini) present in the MegaAwesome repository that instructs Tox how to run. With this file present in the repo, we can run Tox commands right there in that directory. For instance, we can simply run “tox -epep8” to ask Tox to check that our Python code is pep8 compliant.
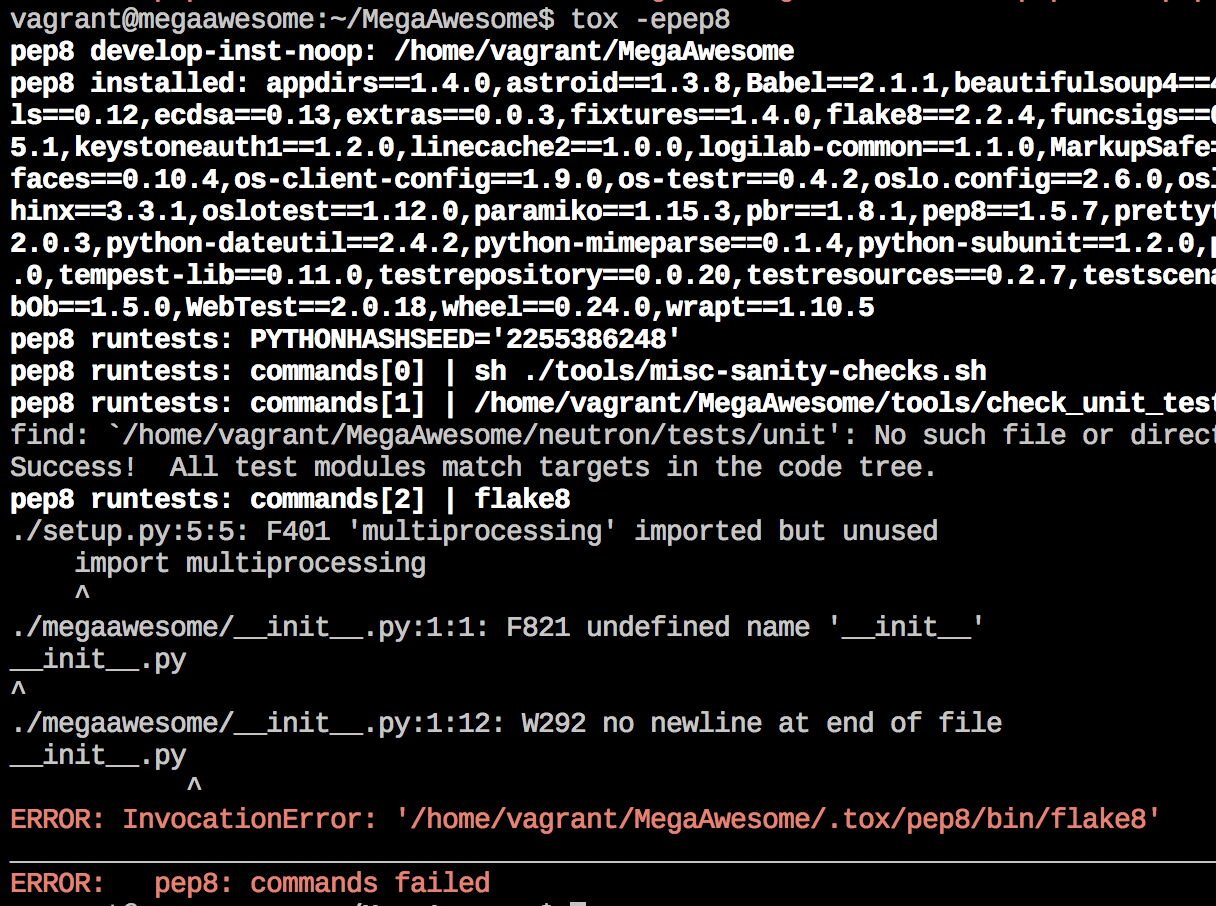
The particular (tox.ini) configuration we’re using here leverages both flake8, as well as pylint (the latter of which is configured in .pylintrc) for our linting needs.
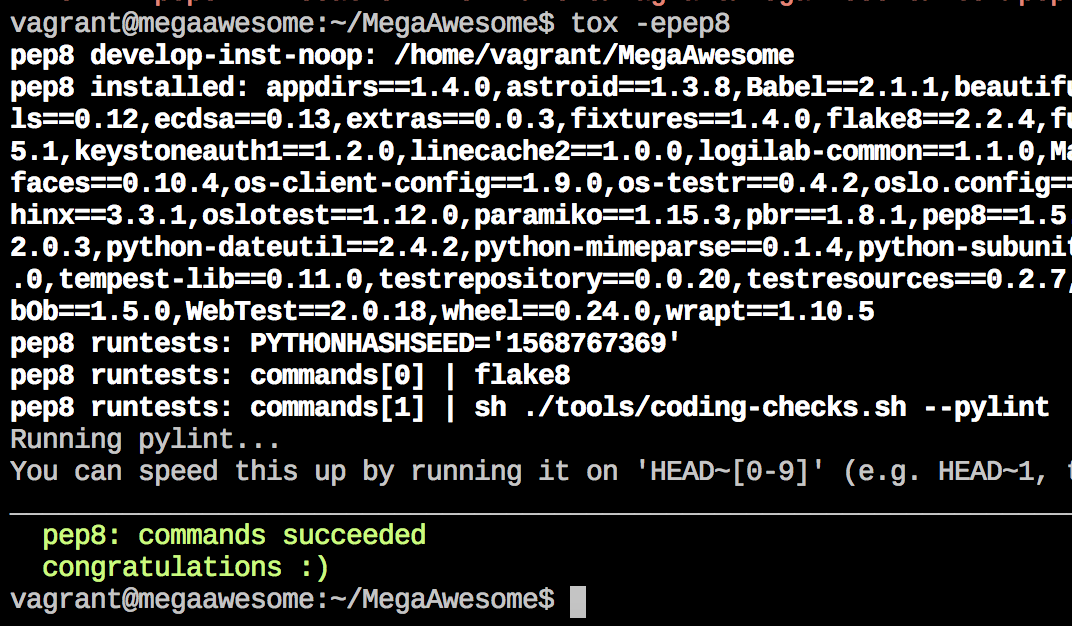
Obviously, we’ve got some work to do. So, we make some changes to make our code more pep8-compliant, then we re-run that long command from further up in the blog post that re-imports our code. Finally, we can re-run PEP8 checks to see that our changes were successful:
Tox is useful for other things too - if you have specified an environment in your tox.ini file for running unit tests, these can be run with simply a different environment argument to the main “tox” command:

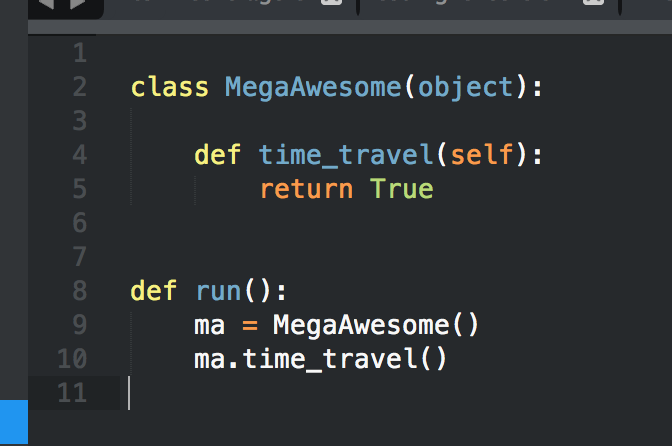
Obviously we have some work to do, since the assertion in our unit test is not passing. Looks like we need to implement the “time travel” function so that our assertion passes:
That should do it! Like with before, we run our long chained command to “re-import” our code, and we can then re-run the unit tests to show that we’re now passing.
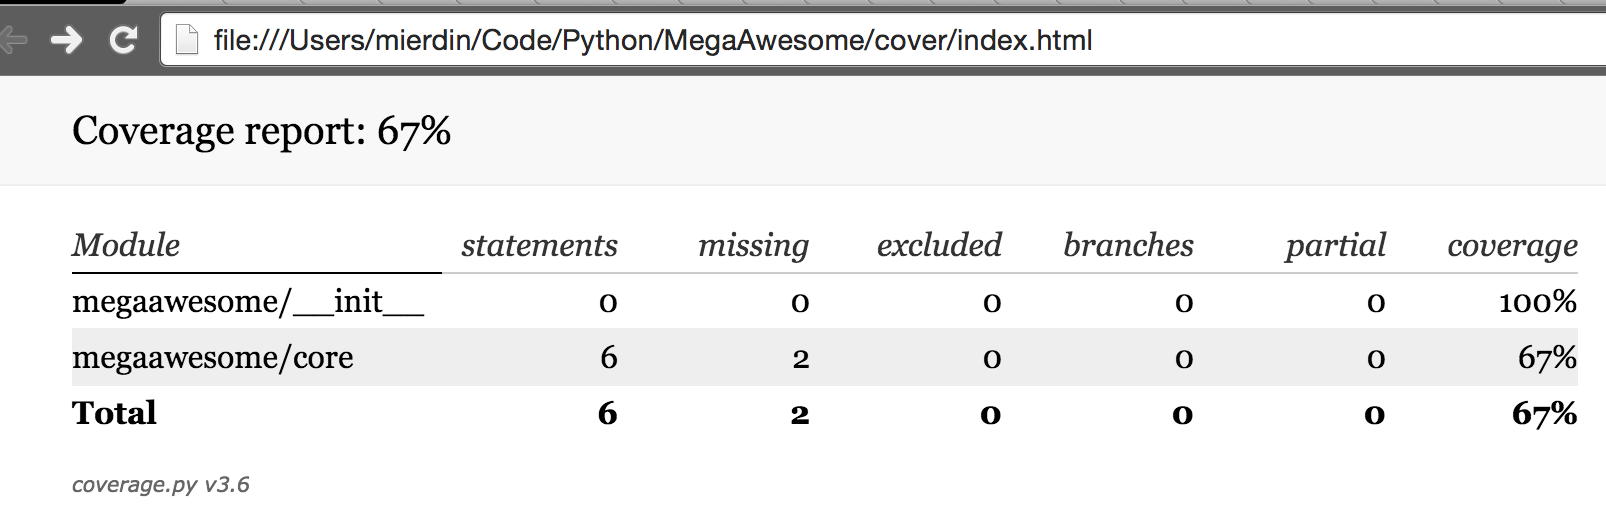
It’s also very easy to do coverage testing in Tox, thanks largely to coverage.py and testr, but there are plenty of options to show how well your unit tests are covering your codebase, in any language. When doing this in Tox, we - as with before - only need to call a different environment, also specified in our tox.ini file:
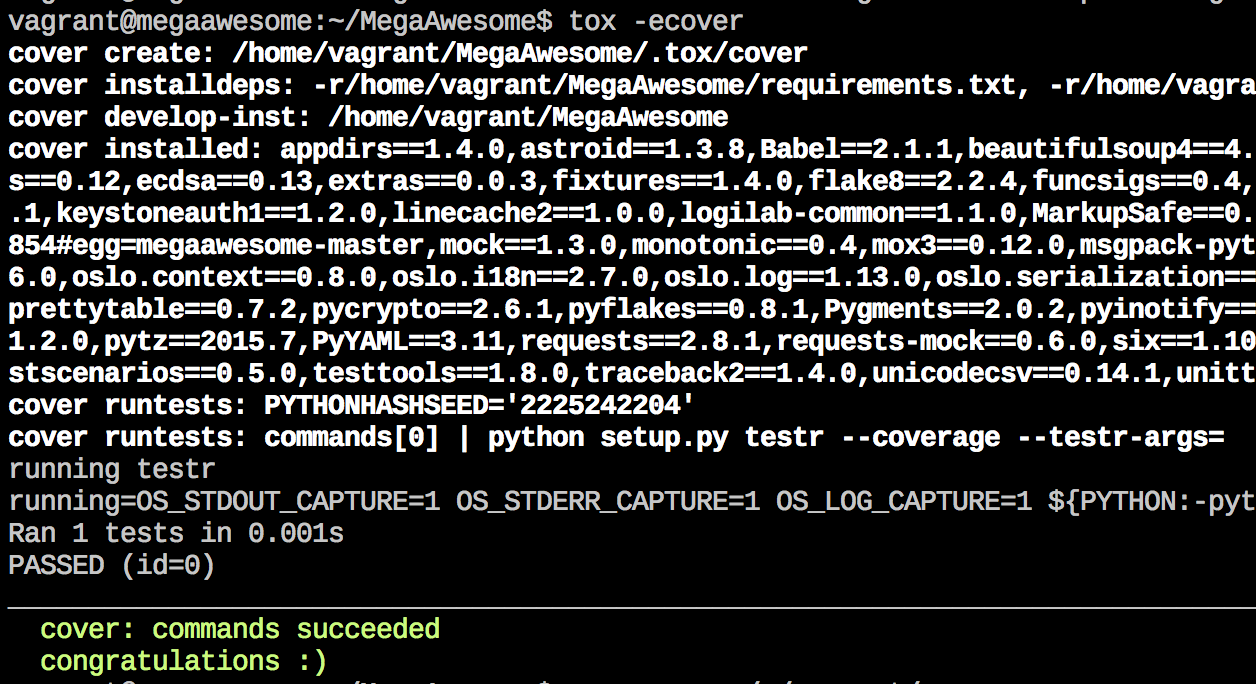
You can view the results of the coverage testing using an in-terminal brower like Lynx, or you can copy the “cover” directory back to /vagrant so you can view it on your laptop’s native browser. Up to you.
Finally, build servers like Jenkins can very easily integrate with Tox so that the same build steps that a developer may be running locally are run within the context of a CI pipeline. Because these configuration files are in the repository, there is no mismatch between how things are configured on the developer’s laptop and in Jenkins.
Of course, the source code for MegaAwesome is still present outside of the virtual machine. In this example, we’re copying code INTO the VM to run these tests but we are not editing the code there (of course this is totally an option for you if you want).
This means that when we make changes, we do so in our editor of choice outside of the VM, and then copy those changes into the VM for testing. We can also manage our Git commits natively outside of the VM as well.
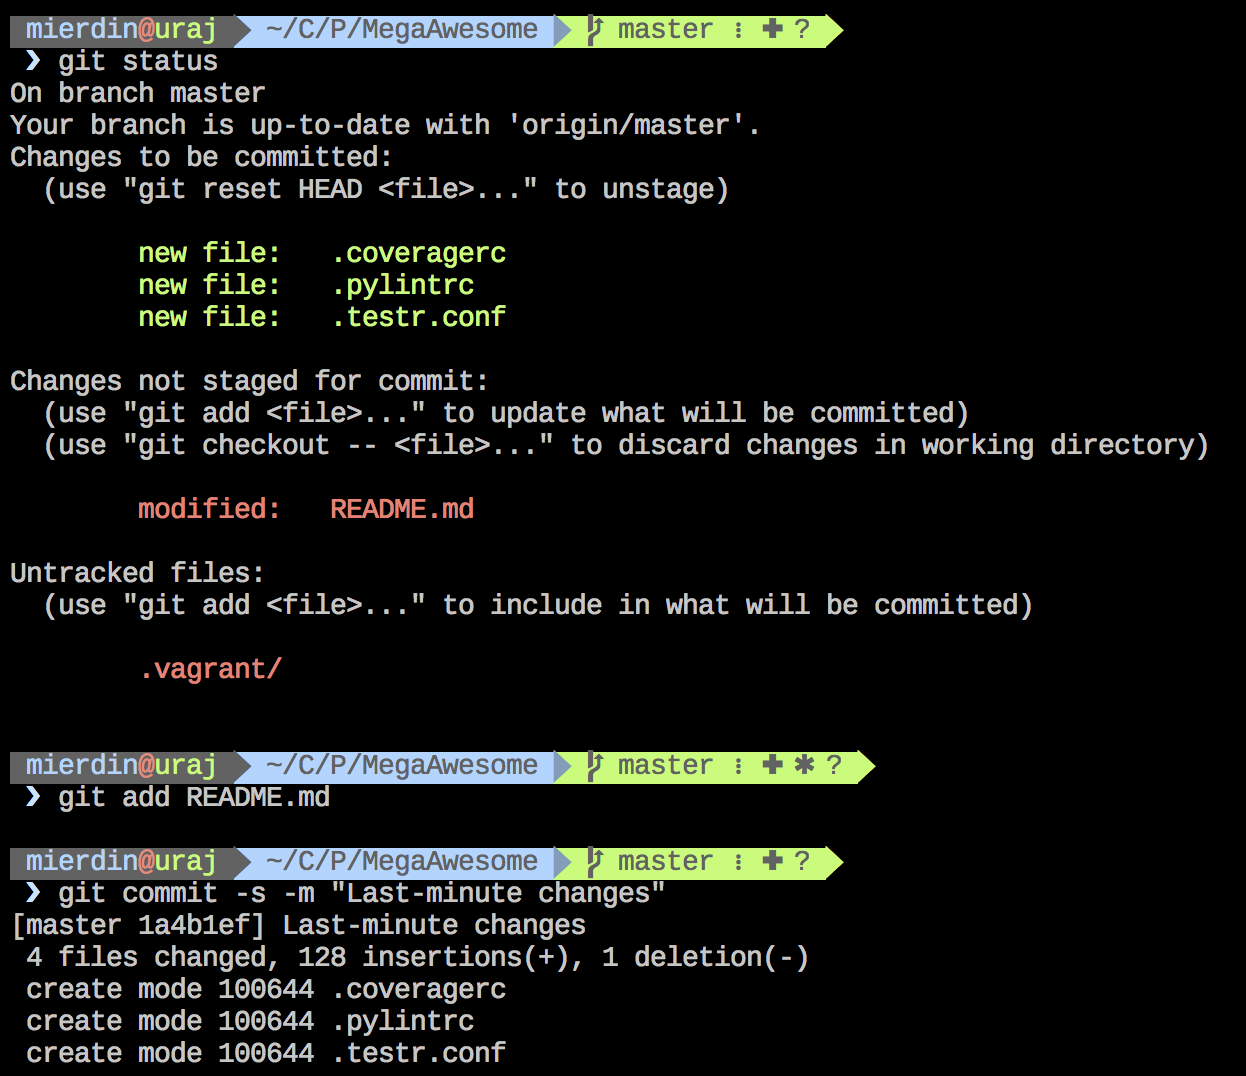
We’re really only using the VM when we feel we’ve made some changes we wish to test out - either by running our software, or by using a tool like Tox. When we’re ready to share those changes with the world, we can always exit out of our virtual machine, and open the native terminal there to commit and push our changes to our Git remote.
Finally, I put together a brief (~22min) video that walks you through this process interactively so you can play along at home (please forgive the poor audio quality, I was away from my normal setup)
The net result of this setup is the flexibility of using whatever editor you want on your laptop operating system, but having a fully automated virtual machine for doing proper development, testing, and debugging that closely reflects a production setup.
The key here is that this setup is automated with configuration artifacts present in the repository itself. It would be very difficult to scale this software project to a team of many developers if we didn’t do this, due to the large amount of overhead associated with configuring and debugging development environments, rather than creating new features that provide value.
Remember that the specific tools don’t matter as much as the methodologies and concepts described here. I’ll summarize some important ones:
I hope this post was helpful and that you now feel empowered to go build your own development environment automation workflow. These are all just suggestions - the concepts and methodology is what’s important. Write your own story here.
The Github repository for MegaAwesome contains all examples referenced above - feel free to clone that repo and check out the details of how this all works. I wrote some of these, and others I pulled from OpenStack Neutron.